Revenue Management
Automate revenue management even when billing using a different application
Automate revenue management for third-party billing by integrating Sage Intacct’s Revenue Management tools.
These tools enable you to process, defer, and recognize revenue from external invoices with greater accuracy while ensuring compliance with ASC 606 and IFRS 15 standards.
The workflow begins when an invoice is sent to a customer outside of Sage Intacct, and is then imported into Sage Intacct as a transaction. Users can then prepare and post the transaction lines from the new Revenue Transaction Entries page, updating both the subledger and General Ledger to ensure accurate revenue impact, deferrals, and scheduled recognition.
Details
-
We added a new setting on transaction definitions to support external revenue management.
-
You can use any third-party billing system and import your external revenue data into Sage Intacct.
-
Revenue entries imported in a draft state for the configured transaction definition automatically appear on the Revenue Transaction Entries page where you can edit, prepare, and post them in bulk.
-
We introduced a new Bulk Action Runs page to monitor the posting process.
How it works
Step 1. Configure a transaction definition for external revenue management
The transaction definition's document permissions must allow editing.
-
Go to Order Entry > Setup > Transaction definitions.
-
Select Edit next to the transaction definition that you want to use for external revenue management.
-
In the User overrides section, select Display drafts on the Revenue transaction entries page.
-
Select Save.
Step 2. Import external revenue data
You only need to provide the minimum fields required for a draft transaction.
-
Go to Order Entry > All > Other transaction activity > View transactions.
-
Select Import.
-
Download the template and enter your external revenue data.
Minimum fields required for a draft transaction-
TRANSACTIONTYPE (the transaction definition configured for external revenue)
-
DATE
-
DOCUMENTNO
-
CUSTOMER_ID
-
STATE (Draft)
-
LINE
-
ITEMID
-
QUANTITY
-
PRICE
-
LOCATIONID
-
-
Choose the file you prepared and select Import.
The draft entries will appear on the Revenue Transaction Entries page.
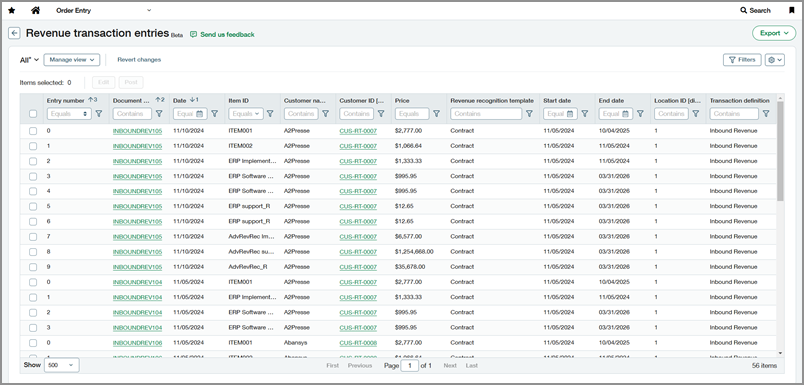
Step 3. Edit transaction entries in bulk
Use bulk edit to update your external revenue entries and prepare them for posting.
-
Go to Order Entry > All > Revenue recognition > Revenue transaction entries.
-
Optionally narrow down the list by using the filters at the top of each column.
-
Select the checkbox at the far left of each row that you want to edit.
-
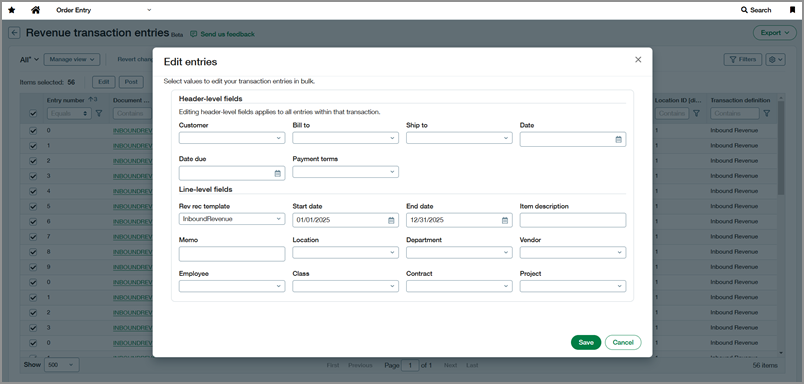
Above the table, select Edit.
-
Edit one or more fields.
To recognize revenue, make sure you assign a Revenue template, Start date, and End date.
When you edit a header-level field, the changes apply to all entries within the associated transaction, even those you didn’t select. -
Select Save.
Step 4. Post transactions in bulk
Posting is an offline process that creates a bulk action run. After posting is complete, the entries are removed from the Revenue Transaction Entries page.
-
Go to Order Entry > All > Revenue recognition > Revenue transaction entries.
-
Use the filter at the top of the Document column to filter by transaction.
-
Select the checkbox in the column header to select all entries on the page.
To post a transaction, you must select all entries associated with the transaction. If there are more than 500 entries in the transaction, go to Order Entry > All > Other transaction activity > View transactions, and then view the parent document and post it. -
Above the table, select Post.
-
Select Post to confirm.
Permissions and other requirements
| Subscription |
Standard revenue recognition for Order Entry |
|---|---|
| Regional availability |
|
| User type |
Business |
| Permissions |
Order Entry
|
| Configuration |
The transaction definition for this workflow must be configured with the following settings:
|
| Dependencies or other requirements |
Entries cannot be deleted directly from the Revenue Transaction Entries page. To delete an entry, go to its parent transaction document in Order Entry > All > Transactions. |