Import service templates
Related information
You have options when creating files to import into Sage Intacct. You are not required to use a template when using the Sage Intacct import service. However, Intacct does provides two different types of templates, or you can make your own.
| Subscription | Company |
|---|---|
| Regional availability |
All regions |
| User type |
Business |
| Permissions |
Company Setup Checklist: Run |
Use your own spreadsheets
The import service uses a new process. This new process allows you to:
-
Start an import using any Excel spreadsheet.
-
Use spreadsheets that have multiple tabs.
-
Use spreadsheets where the header information does not match the Intacct UI or the previous CSV template headers.
-
Use spreadsheets with formulas and calculations that are linked to or from other tabs.
For a successful import, your spreadsheet must be structured so that Intacct can process it correctly. Your column headers do not need to match Intacct headers exactly , as long as you understand how each column maps to the appropriate Intacct fields and data types. Taking the time to align required columns and data types up front can make the mapping process smoother and help ensure a successful import.
During the import process, you’ll map your data in your spreadsheet to the appropriate headers in Intacct. It’s important to map your data correctly to the appropriate Intacct fields. The import service reviews and validates your data against the business logic and required fields for the specific import, such as a journal entry import or an asset import.
After your data is validated, the import service review sheet displays errors or discrepancies found in your data. You then have the opportunity to correct the errors before you import into Intacct.
Create a custom template from an exported list
Many areas of Intacct allow you to customize record list views. You can use a custom view to export a list, and then use that exported file as a custom template for importing new records.
Say that you want to add several new suppliers to Intacct. Here's how you can create a custom import template:
-
Go to Accounts Payable > Suppliers.
-
Select Manage views > Create new views.
-
Select required fields and any other fields that you want to include. The required fields for a Supplier record are:
-
SupplierID
-
Supplier name
-
Supplier billing type
-
Contact name
-
Print as
-
Primary contact
-
Pay-to contact
-
Return-to contact
-
1099 contact
You can include any other supplier fields, but the required fields are mandatory if you plan to use this view to export a file for import. Learn more about adding a custom view.
-
-
Save your view and give it a clear, descriptive name, like Import template - Supplier.
-
On the Suppliers list, select All > Import template - Supplier to display vendors in this specific format.
-
Select Export > Excel or CSV to export the records in this view. Save the file to your computer.
-
Prepare the file for use as a template:
-
Open the exported file
-
Delete all existing records from the file, leaving only the header row that contains the column names.
-
Save the now empty file.
-
You now have a clean template file ready to use for importing new vendor records into Intacct.
Learn more about creating custom views.
Use an import service template
Intacct provides ready to use import service templates for all available imports. If you’re importing information into a new-to-you part of Intacct, the import templates are a great place to start.
All templates contain a header row and a description row. The description row provides information that helps you format your data correctly, such as required fields, and character limits.
For example, General Ledger journal entries require a header and lines associated with the header.
Import service templates are based on the most up-to-date information for their Intacct areas. When new fields are added to a specific area of Intacct, such as Accounts Payable or Fixed Assets Management, the import service templates are also updated automatically.
The Import service workspace has a Welcome page that lists all available imports you can perform with the service, and links to templates for each import. Select the link to save the template to your local machine.
-
Go to Company > Setup > Import data.
-
Go to the Import workspace section and select New import service.
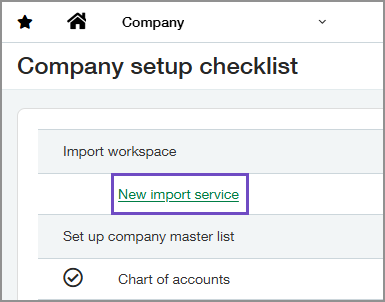
The import service Welcome page opens, displaying the list of currently available imports.
-
Select the template for the import that you want to work on.

Use CSV templates
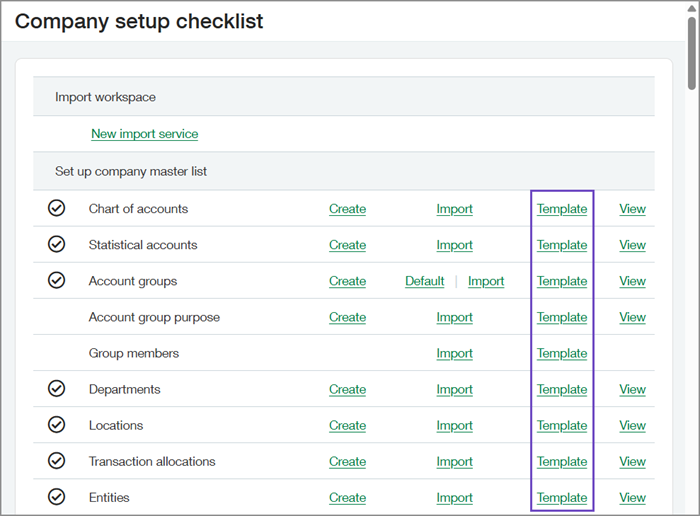
CSV import templates are compatible with the new import service. For instance, the CSV template for Classes or Statistical accounts can be used in the import service. These templates are available on Company Setup Checklist.
From the Company Setup Checklist, select a template for an import that's available through the import service.
-
Go to Company > Setup > Import data.
-
Select Template for an import.
Understand field mapping
Accurate field mapping is key to a successful import. While the column headers in your file do not have to be an exact, you'll need to correlate them to the correct fields in Intacct. This mapping process ensures your data lands in the right place.
Even when the import service suggests a mapping for you, take a moment to review it carefully before proceeding. You have the best understanding of your data. You help prevent errors when you verify mappings.
Select the appropriate field in Intacct that corresponds to each column in your data file. To help you, a preview of your data is displayed alongside the mapping options. We strongly recommend reviewing all your mapped data before importing to ensure accuracy.
Learn more about Import service field mapping.
How to exclude rows from import
To prevent specific rows—such as totals or calculation rows—from being imported:
-
Add a DONOTIMPORT column to your import file.
This column must be added before loading the file to the import service. -
In the DONOTIMPORT column, mark rows to exclude by entering a hash symbol(#) at the beginning of the row.
Rows starting with # are excluded from the import and will not appear on the review sheet.
-
Leave the DONOTIMPORT column unmapped.
During the column mapping step, do not select a mapping for the DONOTIMPORT column. This tells the import service to ignore that column during the upload process. Unmapped columns do not appear on the review sheet.
Next steps
Intacct recommends creating a test import before tackling large and complicated imports. The test import will help you become familiar with the import service process and workspace.
When you feel more comfortable with the differences between the import service and the CSV process, Intacct encourages you to try several of the imports that are currently available.