Intacct Lightning App: Custom validations
Validations are used to check your Salesforce data for readiness to sync with Intacct. Disabling the validations skips these checks, but doesn’t relax any field requirements governed by Intacct. If you’re integrating into a highly customized workflow, you might find it useful to deactivate specific validations to suit your needs. Otherwise, Sage Intacct recommends leaving all validations on.
Enable custom validations
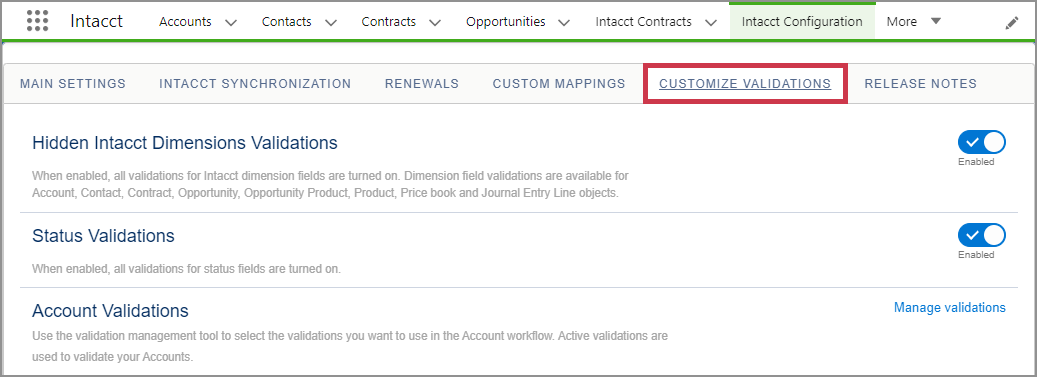
In the Customize Validations section of the Main Settings tab, you can enable customized validations. When enabled, the Custom Validations tab appears on the Salesforce Intacct Configuration page. This tab allows you to choose which validations are used on Contracts, Opportunities, and Opportunity Products.
If you deactivate Custom Validations on the Main Settings tab of the Intacct Configuration page, all validations are returned to the enabled stage, including any you deactivated.
To enable custom validations:
- Log in to Salesforce as an administrator.
- Select the App Launcher and select Intacct.
The Intacct app opens. - Select Intacct Configuration to view general information about your integration.
- On the Main Settings tab, set Custom Validations to Enabled and Save your changes.
The Custom Validations tab appears at the top of the Intacct Configuration page.

Customize your validations
After they're enabled, you can customize the validations for Contracts, Opportunities, and Opportunity Products.
Hidden Intacct Dimension Validations
When enabled, all validations for Intacct dimension fields are turned on. Dimension field validations are available for the following objects:
- Accounts
- Contacts
- Opportunities
- Opportunity Products
- Contracts
- Products
- Price books
Status validations
When enabled, all validations for status fields are turned on.
Activate or deactivate validations
The process to turn on or off validations is the same for all areas that have custom validation options.
- Log in to Salesforce as an administrator.
- Select the App Launcher and select Intacct.
The Intacct app opens. - Select Intacct Configuration > Custom Validations.
- Select Manage validations for the area of validations you want to change.
- In the validation manager window, select the validations you want to turn on or off and Save your changes.
In this topic
