Cheque run overview
Related information
Use a cheque run to process up to 1,000 cheques at a time in an offline process.
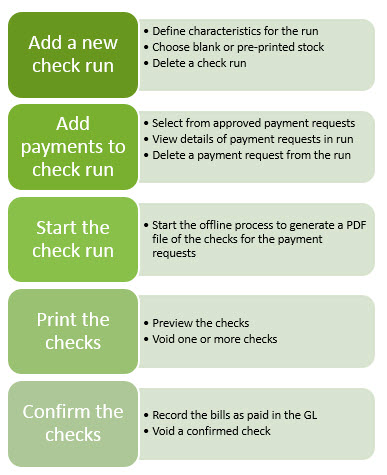
Add a new cheque run
When you add a cheque run, you define the characteristics for how the cheques in the run are processed. For example, you specify the type of paper, the order of the cheques, how many cheques to print on a page, and so on.
Add payments requests to a cheque run
On the Add to Cheque run page, you can use the filter options to add just the set of approved payment requests in the cheque run.
View payment requests added to a cheque run
You can view these requests on the Cheque run detail page.
If you do not want a particular payment request in the cheque run, select the Delete link next to the payment.
Start the cheque run
When you start the cheque run, the system runs an offline process to generate a PDF file of the cheques for the payment requests in the run, which you can then print.
Print and review the cheques
- In the Cheque run list, locate the cheque run and select Print.
A PDF file of the cheques opens.
- Preview the cheques in the file before you print them.
This allows you to fix problems and avoid wasting ink and cheque stock.
If there's a problem with a cheque, you can void the cheque, which removes it from the cheque run:
- Select Details.
- Select Void next to the cheque.
The system runs an offline process to void the cheque.
- Return to the Cheque Runs list and select Run to generate a new PDF file without the voided cheque.
If you choose to void all of the cheques in a cheque run, you essentially cancel the cheque run. Learn more about voiding cheques in a cheque run.
- Print the cheques and review them.
Confirm the cheques
After you have ensured the printed cheques look okay, select Confirm all. The payment request no longer appears on the Payment request list and the AP supplier invoices are recorded in the General Ledger.