Create vs. update records with the import service
Related information
The import service separates the creation of new records and the updating of existing records into two distinct workflows. The separation helps prevent unintended data changes and ensures a more reliable import experience.
Why separate create and update?
-
Avoids accidental overwrites.
-
Clarifies user intent.
-
Enables targeted validation and error correction.
| Subscription | Company |
|---|---|
| Regional availability |
All regions |
| User type |
Business |
| Permissions |
Company Setup Checklist: Run |
Create new records
Creating new records means you’re adding new information to Intacct.
These fields contain the essential information needed for a successful import. The number of required fields will vary depending on the type of data you're adding.
Required fields are a key part of the Create import process. These fields contain the essential information needed for a successful import. The number of required fields will vary depending on what you are importing.
For example:
-
A Class dimension import only require 2 fields.
-
A Fixed Assets Management asset import might require 9 fields or more.
To import new records, you first need to prepare a file with the correct information. Start by identifying what data you want to add and then fill out the template, making sure to include all the required fields. Next, upload this file to the import service. The service will automatically run validation rules to check for errors, such as missing or incorrectly formatted data. You can then fix any errors that are found before the data is officially uploaded and the new records are created.
To learn more, see:
Update existing records
Updating existing records means changing the information in records that already exist in Intacct. To update information in existing records (such as titles, currencies, or statuses), your import file must include the ID of the record you want to update. For most records, the ID (like VendorID or CustomerID) is sufficient to update fields on the record.
How to update existing records:
-
Export the records you want to update, including their IDs.
-
Update the relevant fields in your file.
-
Include only the identifier and the fields you are updating in your import file.
-
Use the import service to upload and map your file, then review and validate changes before importing.
Example: Update Customer records
You can use the import service to update Employee information. You can use the Employee ID to update these records.
In this example, some customers were added to Intacct without their Customer type ID assigned. This is how to update those fields with an import.
Step 1. Export Customer ID numbers and records to update
Use Intacct lists as the starting point for your import files.
-
Go to Accounts Receivable > Customers.
-
Filter the list of customers by those who's Customer type ID is blank.
You can set up a custom view that includes these columns if needed.
-
Select Export > Excel.
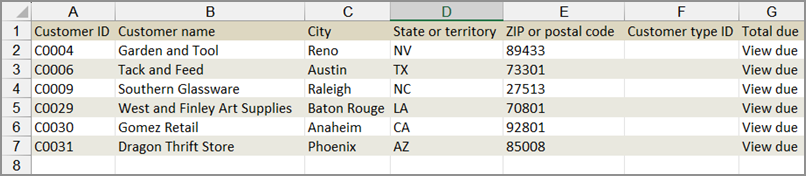
The following is an example of an exported Excel file for Customer records that are missing the Customer type ID.
-
Column A contains the Customer ID numbers.
-
Column F is blank because these records need to be updated.
-
The other columns contain information about each Customer.
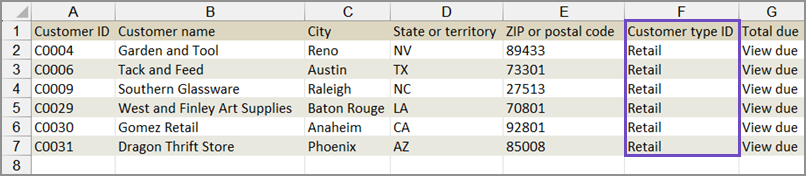
Step 2. Update fields
The file you prepare for import only needs to contain the Customer ID and the column with updated information.
-
In the exported file, update the Customer type IDcolumn with the appropriate information for each customer.
-
Delete all columns except Customer ID and Customer type ID.
For example, the following file contains only the existing Customer ID, and Customer type ID.
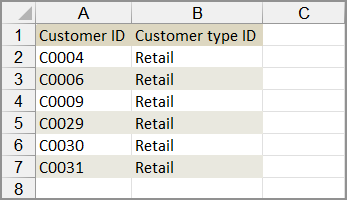
Notice that :
-
There are only 2 columns of information. All other columns have been deleted.
-
The Customer type ID has been updated with new information.
-
-
Save your file.
Step 3. Upload and import Customer information with the import service
-
Go to Company > Setup > Import data.
-
In the Import workspace section at the top of the page, select New import service.
-
Select Accounts Receivable > Customers > Update.
-
Select Upload file and select the file with the updated employee records.
-
Map the fields in your file to the fields in Intacct and select Continue.
If your column headers are from the exported file, the mapping can happen automatically.
-
Review the uploaded information before importing. Make any changes as needed.
See Import service data validation tools for more information about reviewing data in the import service.
-
When the information is correct, select Import.
Update record IDs
You can use the import service to update the record IDs for the following record types:
-
Classes
-
Chart of Accounts
-
Statistical Accounts
This allows you to change the unique identifier (ID) of a record.
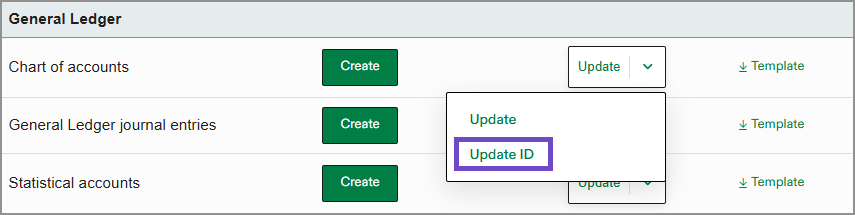
The import service now includes an Update ID dropdown menu to make these imports easier. This dropdown lets you select between the two update options:
-
Update: Modify existing records without changing the record’s unique ID.
-
Update ID: Change the unique ID for supported records.

How to update record IDs:
-
Prepare a file containing the existing Record numbers and the new IDs for the records you want to update.
-
Use the import service and select the Update ID option.
-
Upload your file, map the fields, and review the information before importing.
-
Confirm that the IDs have been updated and check for any downstream impacts.
Example: Update General Ledger account numbers
You can use the import service to update General Ledger account numbers.
The only way to update General Ledger account numbers is to use the record number associated with the account.
Step 1. Export account numbers.
-
Go to General Ledger > All > General Ledger accounts.
-
Use a view that shows both the Record number and Account number columns in the list.
You can set up a custom view that includes these columns if needed.
-
Filter the table to include only the accounts to be updated.
-
Select Export > Excel.
The following is an example of an exported Excel file for General Ledger accounts. Column A contains record numbers. Column B contains account numbers. The other columns contain information about each account.

Step 2. Update account numbers in the exported file
The file you prepare for import only needs to contain two columns: the existing record numbers, and updated account numbers.
-
In the exported file, update the account numbers to new numbers.
-
Delete all columns except Record number and Account number.
For example, the following file contains only the existing record numbers and the updated account numbers.
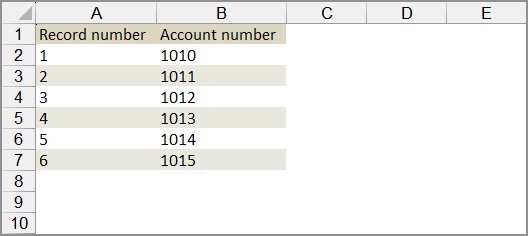
Notice that :
-
there are only two columns of information. All other columns have been deleted.
-
the account numbers have been updated to new numbers.
-
-
Save your file.
Step 3. Update account numbers with the new import service
-
Go to Company > Setup > Import data.
-
In the Import workspace section at the top of the page, select New import service.
The import service workspace opens.
-
Select Chart of accounts > Update > Update ID.
The Chart of accounts update workspace opens.
-
Select Upload file and choose the file with the updated account numbers.
-
If your file has more than one tab, select the tab with the updated account numbers.
-
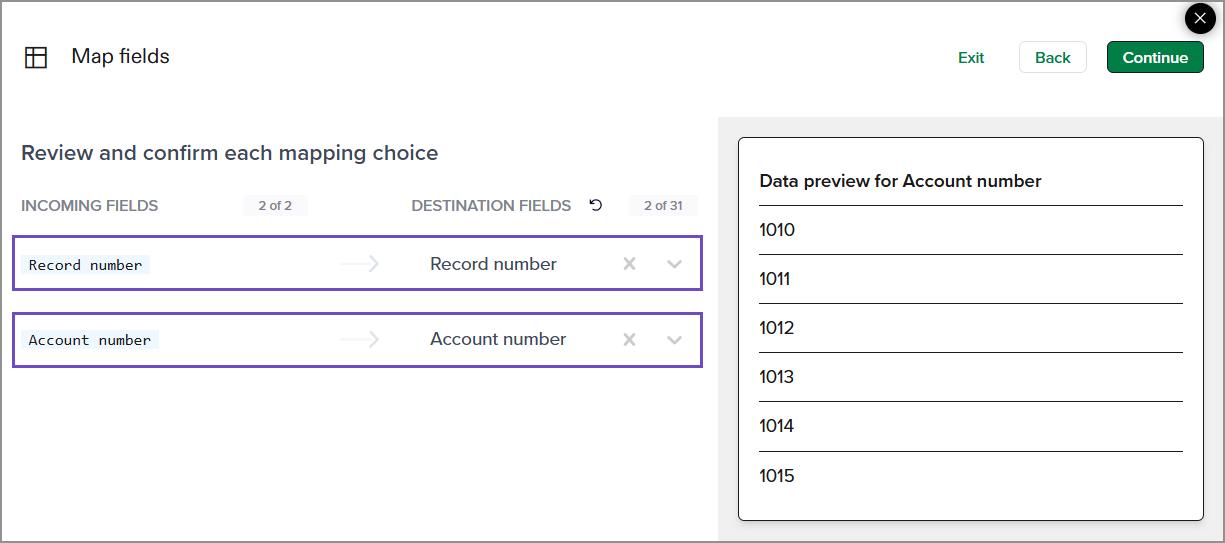
Map the fields in your file to the fields in Intacct and select Continue.
If your column headers are from the exported file, the mapping may happen automatically.
-
Review the uploaded information before importing. Make any changes as needed.
See Import service data validation tools for more information about reviewing data in the import service.
-
When the information is correct, select Import.