Sync sales transactions
Related information
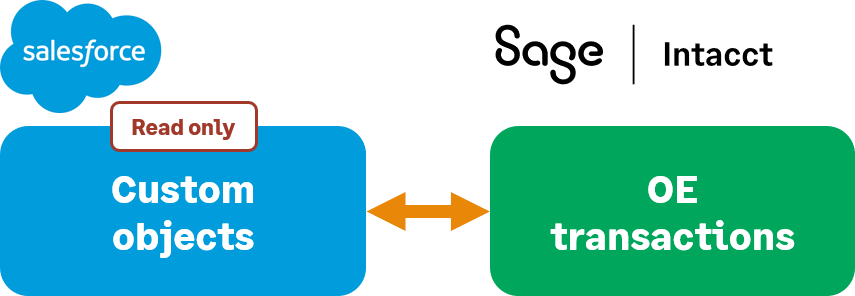
Sage Intacct Order Entry transactions are synchronized with Intacct-provided custom objects in Salesforce.
Sales transactions overview
The custom objects in Salesforce are read-only and mirror the original Intacct document. These records can be created in Salesforce using the Create <Transaction> buttons that can be added to page layouts after you’ve installed the Advanced CRM Integration package. The transaction line item details for these records can also be synchronized to Salesforce.
The synchronization lets you set which Order Entry transaction definitions that can be used in Salesforce, and which transactions Intacct writes back to Salesforce. For example, you can allow Salesforce users to post Sales Quotes and Sales Orders from Salesforce, but not allow them to enter Sales Invoices. You could then set Sales Invoices to post from Intacct to Salesforce to close the loop.
Select sales transaction settings:
- Log in to Intacct as an administrator.
-
Go to Company > Admin > Subscriptions > Advanced CRM Integration and select Configure.
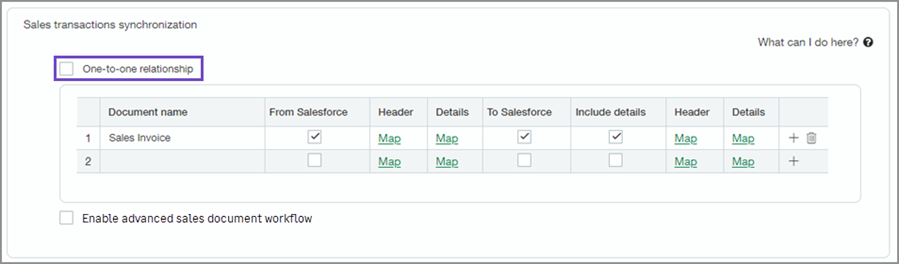
- Optionally, on the Settings tab, in the Sales transaction synchronization section of Order Entry Integration, select the One-to-one relationship checkbox (see One-to-one relationships).
- Use the Sales transaction synchronization table to set sync options and Save your changes. You can use the classic or advanced workflow settings.
One-to-one relationships
The Advanced CRM Integration uses a one-to-many relationship as the default for the relationships between sales transactions and Opportunity records. You can have more than one transaction type associated with an Opportunity.
When you select the One-to-one relationship checkbox, the integration only allows one record per transaction type. When checked, no other records can be created for the mapped transaction types.
Classic sales transaction workflow
The classic sales transaction workflow syncs data between Intacct and Salesforce, with read-only information from each system available in the other.
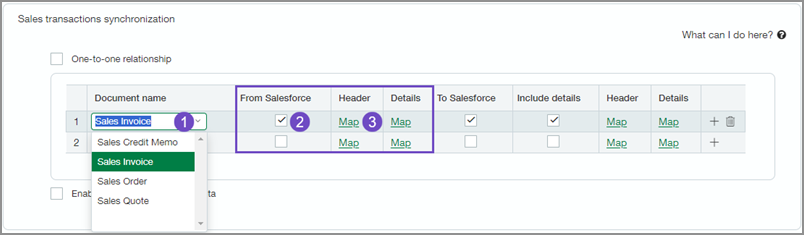
Synchronize records from Salesforce as read-only information in Intacct using the sales transaction table:
-
The Document name field allows you to select the Order Entry document type.
-
Check From Salesforce to have order data come from Salesforce.
-
Use the Headers and Details Map links to map the OE document header and line item information to the Opportunity Header and Opportunity Product details.
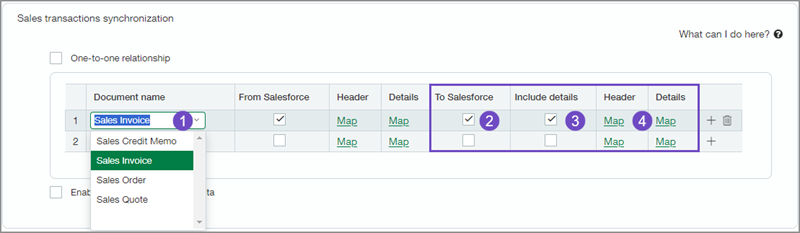
You can also synchronize records to Salesforce from Intacct as read-only information:
-
The Document name field allows you to select the Order Entry document type.
-
Check To Salesforce to have Intacct data based on the document type sync to Salesforce.
-
Check Include details to have Intacct line item details also synced to Salesforce.
-
Use the Map links for Headers and Details to map the sales invoice line item details to the custom IntacctSales invoices object in Salesforce.
For more information about Order Entry field mapping for the classic sales transaction workflow, seeOrder Entry classic sales transactions field mapping.
Advanced sales document workflow
You can now create Order Entry documents directly in Salesforce, either from an object or as a standalone document. You then sync the document to Sage Intacct either manually or using scheduler in the Intacct app in Salesforce to automate syncing.
The advanced sales document workflow uses a single Intacct object in Salesforce to coordinate syncing from Intacct and then back to Salesforce. This object is called the Sales Document Object.
To enable this workflow, select the Enable advanced sales document workflow checkbox. The Sales transaction synchronization table changes from the classic configuration to the advanced workflow configuration.

-
The Document name field allows you to select the Order Entry document type.
-
Check From Salesforce to have data sync from Salesforce to Intacct.
-
Check To Salesforce to have Intacct data sync to Salesforce.
-
Check Include details to have OE line item details synced to Salesforce.
-
Use the Map links for Header and Detail to map the sales invoice line item details to the custom Intacct sales document object in Salesforce.
-
Save your changes.
For more information about field mapping for the advanced sales document workflow, seeOrder Entry advanced sales document field mapping.
Classic vs. advanced workflows
To ensure smooth data syncs, Intacct recommends evaluating how the classic and advanced workflows integrate with your existing processes. These workflows use different objects in Salesforce for data sync. Therefore, frequent switching between the workflows is not recommended, as it can lead to confusion regarding data location and expected behavior.
Intacct recommends that you analyze how each workflow aligns with your existing processes. Test the workflows in a sandbox before implementing any changes in your production environment.
Select the workflow that best suits your business needs to maintain consistency of a streamlined experience.
Payment settings
The sales transaction sync table lets you select which transactions are allowed to come from Salesforce, and which ones post back to Salesforce. When you select the Payment details checkbox, Intacct also posts payment detail information to Salesforce. Payment details provide insight into open balances and payment history.
When you select Enable AR payments synchronization, Salesforce and Intacct automatically sync payment records. This keeps payment information up-to-date, enhances tracking and reporting, and allows field mapping for AR payments and details.
To configure the Order Entry application to sync payment information:
-
In Intacct, do one of the following:
- Go to Order Entry > Setup > Configuration.
- Go to Company > Admin > Subscriptions. Then select the Order Entry icon and select Configure.
-
On the General configuration tab, in the Enable functionality section, select Display payment status.
-
Save your changes.
-
Go to Company > Admin > Subscriptions > Advanced CRM Integration and select Configure.
-
In the Order Entry Integration section, select the Payment details checkbox.
-
Select Enable AR payments synchronization to turn on AR payment sync.
When selected, the field mappings for AR payments become available:- AR payments (headers)
- AR payment details (lines)
Contact your account manager or submit a support ticket to request access to AR payments for the Advanced CRM Integration. You will not see the option to turn on the synchronization unless you already have access. -
Save your changes.
In this topic