Intacct Lightning App: Intacct Synchronization
Related information
The IntacctAdvanced CRM Integration package includes an Intacct application that has different controls for different aspects of the integration.
You can also use the Intacct application as a template for customizing your own Salesforce apps. The Intacct application can also be used to test or demonstrate the integration.
To open the Intacct Lightning App:
- Log in to Salesforce as an administrator.
- Open the App Launcher and select Intacct.
The Intacct app opens. - Select Intacct Configuration to view general information about your integration.
You can access the pages of the Intacct Lightening App from the Salesforce Classic UI as well.
An overview of integration and synchronization settings can be seen on the Intacct Synchronization tab on the Intacct Configuration page in Salesforce.
General
The General tab of Intacct Synchronization shows you the general settings of your integration.

Reseller Account Types
Use this dialog to select up to 3 reseller account types. If no account type is selected, the default account type is Channel Partner / Reseller.
Sync Records For Unmapped Users
When enabled, Account and Contact records are automatically synced to Intacct when unmapped users edit the records.
The rest of the General tab displays settings that are controlled on the Advanced CRM Integration configuration page in Intacct. For example, to add new accounts to Intacct, see Account settings.
Order Entry (Legacy)
The Order Entry tab of Intacct Synchronization allows you to set record types and stages, and create Order Entry fields. This tab also shows you settings specific to your integration with Order Entry.
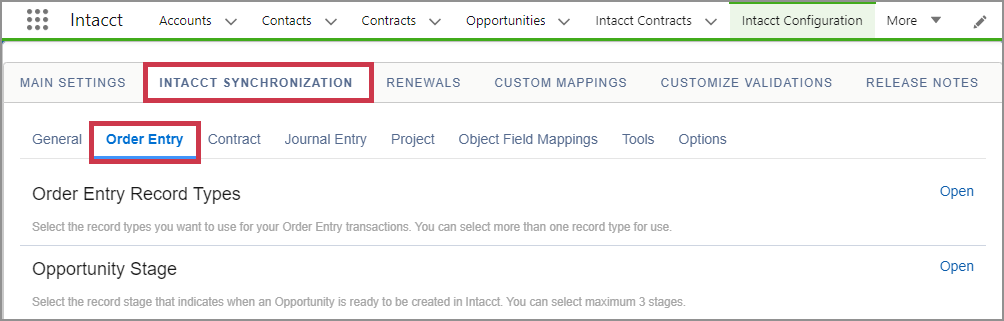
Order Entry Record Types
For more information about Order Entry record types, see Custom Opportunity record types for Order Entry.
Opportunity Stage
Select the record stage that indicates when an Opportunity is ready to be created in Intacct. You can select a maximum of 3 stages.
Sync Opportunities Job
Schedule job for syncing Opportunity records to Intacct. The schedule name should be unique.
Create Order Entry fields
Checks and creates the Order Entry fields automatically for the renewal template and revenue recognition templates.
Sales Document Defaulting
Use the field defaulting tool to define the default Sales Document field values used when a Sales Document is created.
Select the default value for as many fields as needed on a Sales Document. This is part of the advanced sales document workflow.
Sales Document Item Defaulting
Use the field defaulting tool to define the default Sales Document Item field values used when a Sales Document Item is created.
Select the default value for as many fields as needed on a Sales Document. This is part of the advanced sales document workflow.
Sales Document and Sales Document Item Mapping
Use this tool to map sales documents and items from your organization with Sales Document and Sales Document Item objects.
Create Sales Document Job
Schedule jobs for creating Sales Document and Sales Document Line records. The Schedule Name must be unique.
Sync Sales Document Job
Schedule a job for syncing Sales Document records to Intacct. The Schedule Name must be unique.
Contract
The Contract tab of Intacct Synchronization allows you to set several different options for your integration, and shows you settings specific to your integration with Contracts.
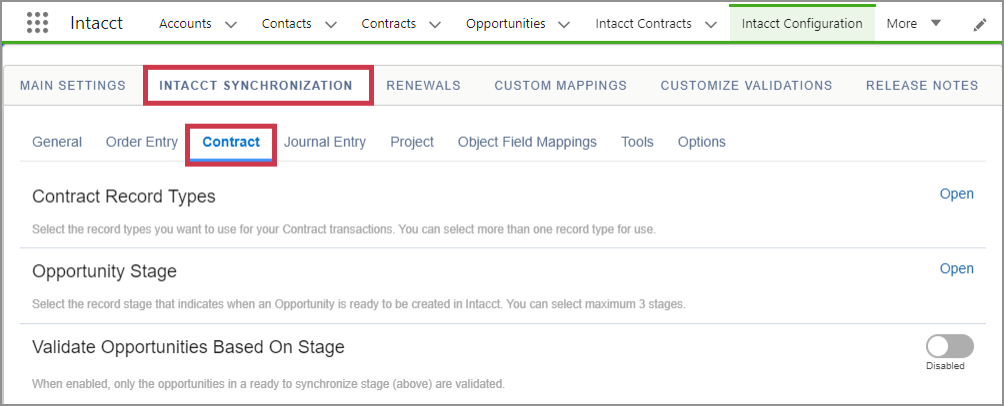
Contract Record Types
For more information about Contract Record Types, see Custom Opportunity record types for Order Entry.
Opportunity Stage
Select the record stage that indicates when an Opportunity is ready to be created in Intacct.
Validate Opportunities Based on Stage
When enabled, only the opportunities in a ready to synchronize stage are validated. The ready to synchronize stage must be selected in the Opportunity Stage.
Contract Status
Set the Contract Status that indicates when a Contract is ready to be created in Intacct.
Add-On Opportunity Default Record Type
Select the record type that you want to use as the default for Add-On Opportunities.
If no value is selected here, the record type for Add-On Opportunities is inherited from the original Opportunity.
Default Add-On Opportunity Stage
This value will be defaulted to Add-On Opportunities. When no value is selected, the first stage from the picklist will be selected to create the new Opportunity.
Sync Contracts only once
For more information, see Contracts sync options.
Default Opportunity Product Line Number field for digital board books
When enabled, the Intacct line item field is automatically populated on Renewal Opportunity Products. This field is used for Digital Board Book calculations.
Journal Entry
The Journal Entry section of the Intacct Synchronization tab controls journal entry behavior in Salesforce.
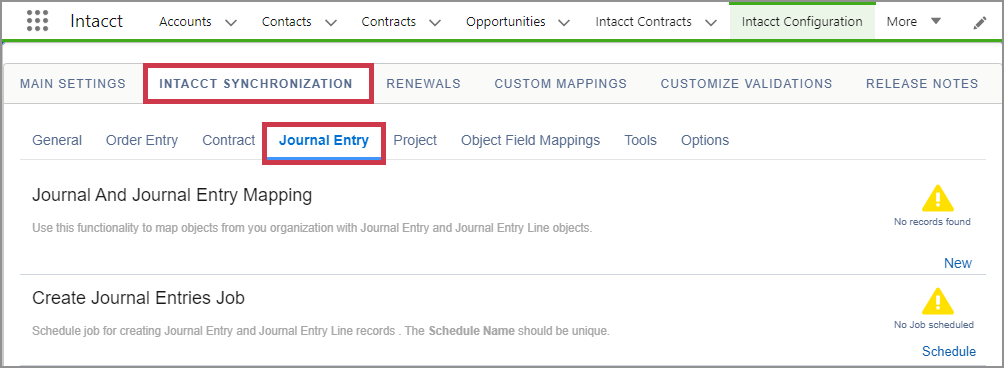
Journal and Journal Entry Mapping
For more information, see Journal and journal entry mapping
Create Journal Entries Job
Use this tool to create journal entry and journal entry line records in Salesforce on a schedule. The name of your schedule must be unique.
Sync Journal Entries Job
Use this tool to sync journal entry records to Intacct. The name of your schedule must be unique.
Journal Entry Dimension Validations
Use the validation management tool to select the Journal Entry Dimension validations that you want to use when the Journal Entries are generated.
Required Intacct Dimensions Validations
When enabled, validations for Intacct dimension fields based on Intacct Account are turned on.
Create Field for UDDs
Checks and creates the user-defined dimension (UDD) fields automatically.
Project
The Project section of the Intacct Synchronization tab controls project behavior in Salesforce.
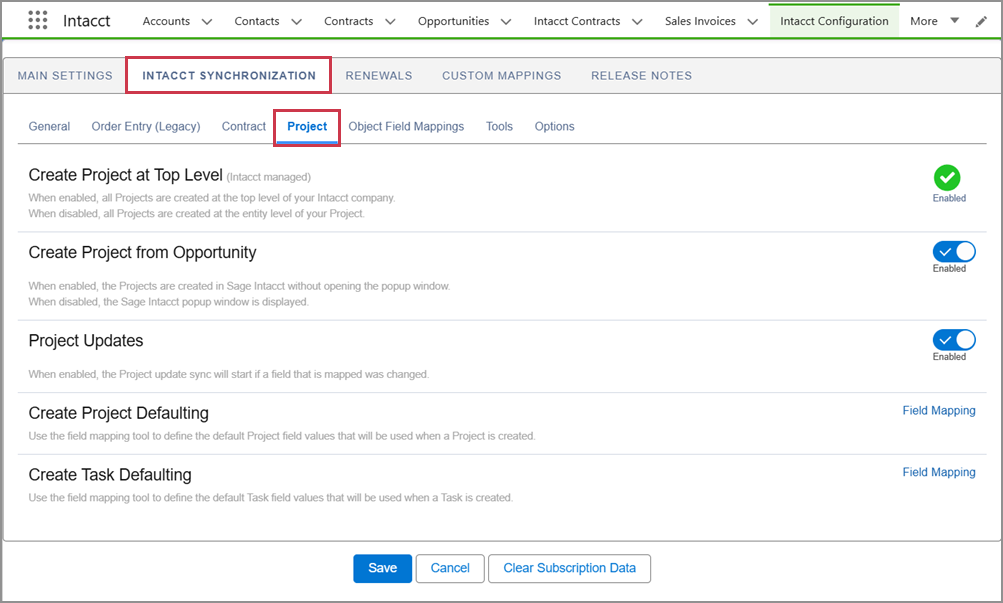
Create Project at Top Level
When enabled, all Projects are created at the top level of your Intacct company.
When disabled, all Projects are created at the entity level of your Project.
This is an Intacct-managed setting.
Create Project from Opportunity
When enabled, Projects are created in Intacct without opening a popup window.
When disabled, the Intacct popup window is displayed.
Project updates
When enabled, the Project update sync will start when a mapped a field is changed.
Create Project Defaulting
Use the field mapping tool to define the default Project field values that will be used when a Project is created.
Create Task Defaulting
Use the field mapping tool to define the default Task field values that will be used when a Task is created.
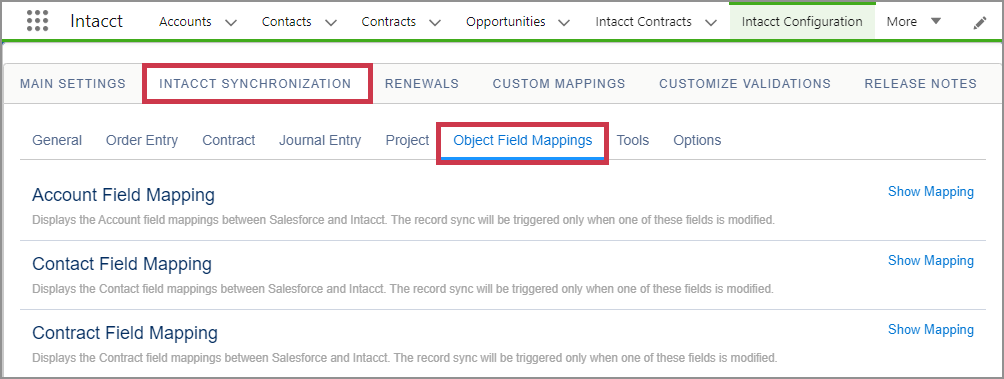
Object Field Mappings
Use the Object Field Mappings tab to review the field mappings between Intacct and Salesforce.
You can change field mappings in Intacct. The tab in Salesforce only shows existing mappings between the systems.
Tools
The Tools tab contains the Break Record Links tool, and the Intacct Mass Synchronization tool.
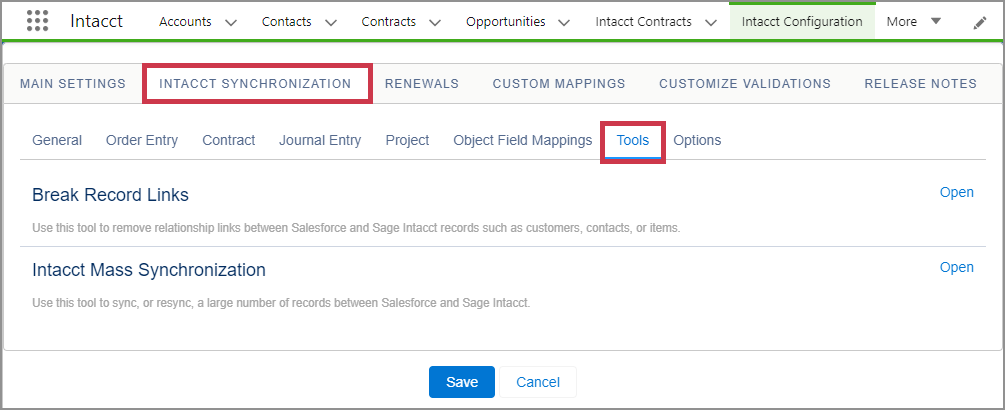
Break Record Links
Use this tool to remove relationship links between Salesforce and Sage Intacct records.
- Select Open.
- In the pop-up, select the Salesforce object that has a link you want to break. For example, you select the Account object.
- Find the Account with the link that you want to break.
The Account information is displayed in a table. - Verify that the correct Account has been selected and select Break Link.
- If you need to break more links, repeat the above steps. Select Close when finished.
The following links can be broken currently:
| Intacct | Salesforce |
|---|---|
| Customer | Account |
| Contact | Contact |
| Item | Products |
Intacct Mass Synchronization Tool
A link to the Intacct mass synchronization tool is provided here on the Tools tab. When you select Open, a new browser tab opens the Mass Sync tool.
For more information on how to use the tool, see Intacct mass synchronization tool.
Options
Intacct provides custom pages for adding opportunity products and journal entries. You can choose to use Intacct pages or Salesforce default pages.
For example, when you add an opportunity product to an opportunity for contracts, the Intacct page in Salesforce behaves the same as the Add Contract Line popup in Intacct. The Intacct page in Salesforce also shows and hides fields based on the selections you make. This functionality is not available when you use the Salesforce default opportunity product add page.
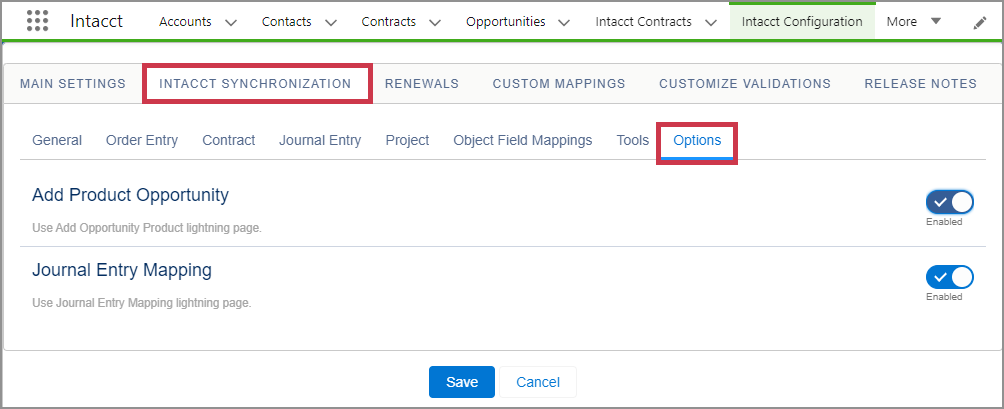
Add Product Opportunity
Use the Intacct Add Opportunity Product lightning page.
Journal Entry Mapping
Use the Intacct Journal Entry Mapping lightning page.
In this topic